My protable 5-inch Server rack
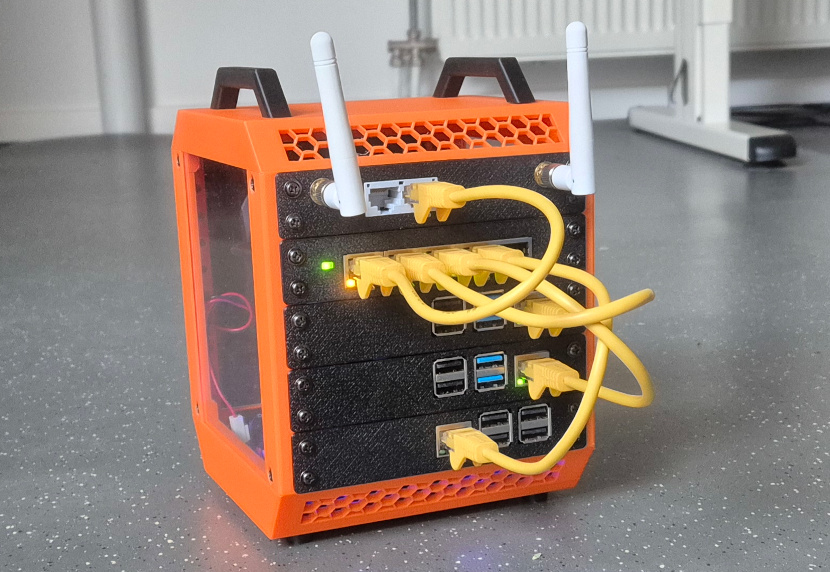
This website is hosted on a Raspberry Pi 4 in my 5-inch mini server rack. Sometimes I take this rack with me on a tour for demonstration purposes. Therefore it may happen that this website is occasionally temporarily offline while traveling. I'll try my best to keep the downtime as short as possible.
Introduction
I do admit, this mini server rack is not my own idea. As is nowadays often the case I got my inspiration for this project from the internet. 10-inch server racks are very popular these days, especially now we can 3D print them ourselves. Michael Klements has reduced the size of his 10-inch Labrax server rack by 50%, which resulted in a cute little 5-inch rack.
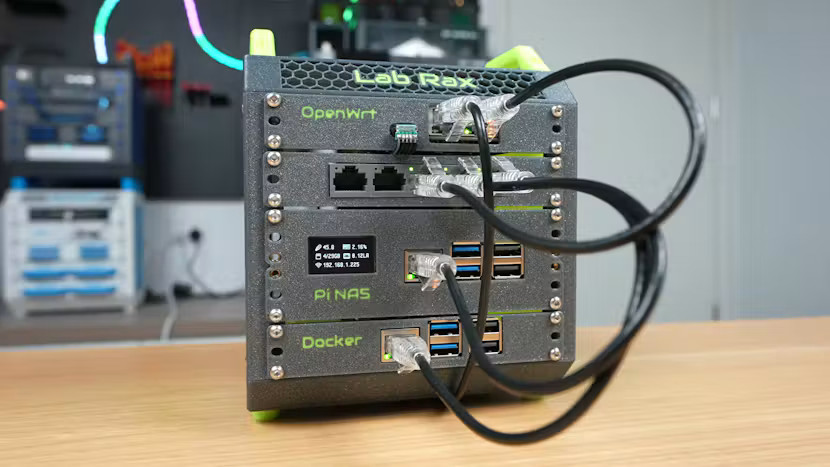
When I saw this thing it was love at first sight. I kept thinking about what I could do with it and how I would build it myself. That's when there's no turning back. I simply HAD to build one myself. Otherwise there is absolutely no way for me to get it out of my head.
My own variations on the original design
After studying Michael's original design of his 5-inch rack, I've decided to make a few alterations.
The rack elements are simplified. Originally a 1U rack panel has 3 mounting holes on either side. On a ½U panel this is going to be a really tight fit. Therefore I've decided that 2 holes on either side is more than sufficient. That provides a calmer appearance.
Also the hight of the ½U panels is rounded up to 25 mm. This gives me just a little more hight to play with, without visibly disturbing the width to hight ratio.
Also my top and bottom shells are not the same on my rack. This allowed me to make room for the power supply in the bottom shell. Now I can power the entire rack with one simple PD enabled USB-C power supply. If necessary I can also power the rack using a PD enabled power bank or a laptop power supply.
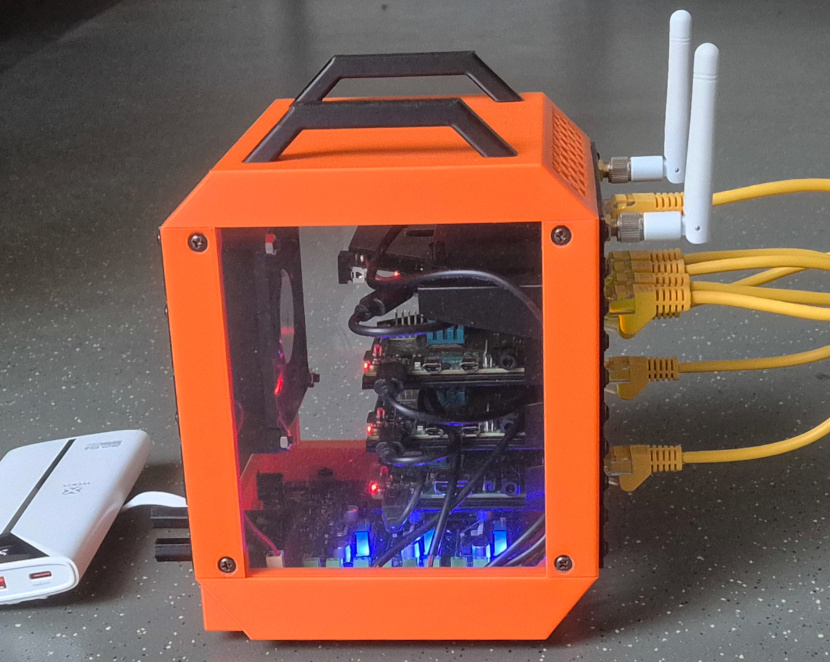
And finally I've made the rack a bit deeper. The original rack was just deep enough to fit a Raspberry Pi in it. Thanks to the square footprint of my rack I can now mount a fan on the inside of the back panel. I like this better than bolting a fan on the outside of the rack.
But why?
Personally I don't have much use for this small Server rack. One of my main servers, which runs Proxmox, is an old, discarded 19-inch server. My second Proxmox machine runs on a discarded half broken laptop. Neither of these are ever going to fit into this small server rack.
Three Raspberry Pis will fit just fine though.
And since I like to get other people enthusiastic about self-hosting and home automation, it seemed like a very nice demonstration tool to me.
Due to its compact size, this rack is very easy to carry on my bicycle.
And this project helped me extending my 3D drawing skills.
Network
Because this device is supposed to "portable", it must be very flexible when it comes to connecting it to the internet.
At home I can use an ethernet cable to connect it to my own internet.
On other locations I can use the available public Wifi to connect the server to the internet.
In case no public Wifi is available I can always fall back on my phone's data plan.
You won't expect to have any problems serving such a simple website like this.
But when you think about it a little deeper you may realize that it requires quite some network magic to accomplish this.
This server rack can be connected to the internet in several different ways.
And most of the time I will not be the manager of the network.
Therefore it is rarely possible to open ports in the firewall.
And getting a static IP address is also not very likely.
Thanks to modern tools like Tailscale and Cloudflare connecting a roaming server to the internet is child play nowadays, no matter where the server and/or client are located on the internet. Tailscale shines in making private services available to you, while the rest of the world is not even aware that these services exist. And Cloudflare can be used to make services publicly available safely.
The components
The rack has space for 5 devices with a hight of ½U.
When required, the rack can be adapted to hold more or even fewer devices.
Although that may disrupt the visual appearance of the rack.
In case you want to build a 5-inch rack yourself, with fewer devices, I recommend to keep the 5 unit capacity and simply cover the empty slots with blank front panels.
Slot 1: The Router
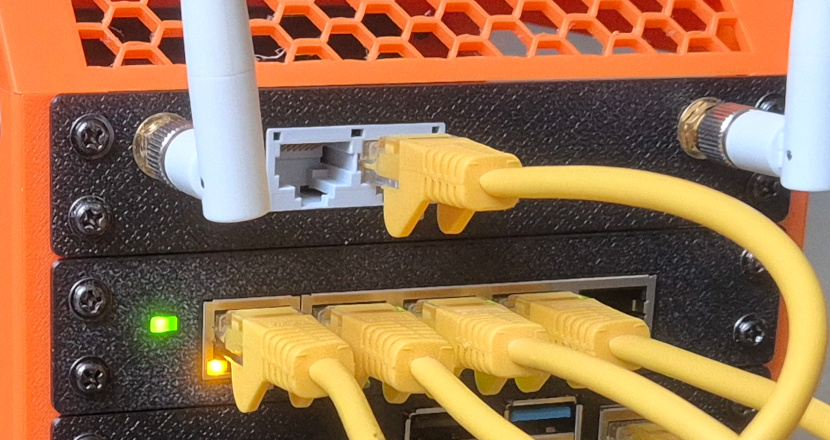
The top slot is occupied by the a router. In my case I use GL-Inet AR300M, which I've stripped from its case. These routers run on OpenWRT, with a proprietary GUI built on top of that by GL-Inet.
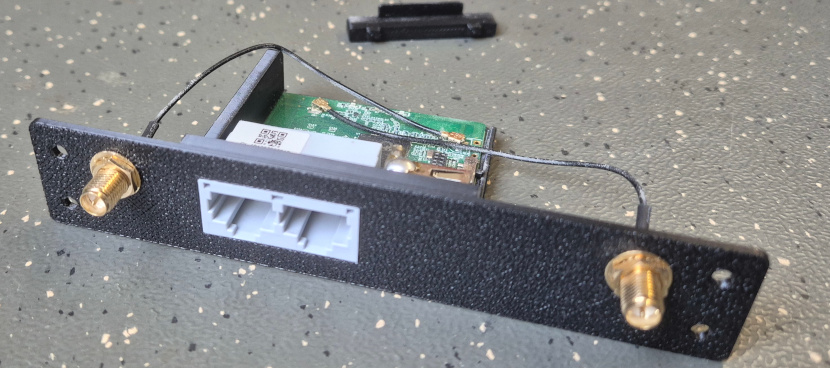
Such a travel router has several options to connect the servers to the internet.
- WAN via Wifi. This is, for me, the most common way to connect to the internet. You can connect the router to any arbitrary Wifi network. And that connection will connect everything to the internet. This way you might be limited by the host network's firewall. But if the firewall gets in your way, you can always use a VPN to bypass it.
- WAN via Ethernet. It is also possible to connect an ethernet cable to the WAN input. This will probably result in a faster internet connection. However don't expect any miracles from this tiny router.
- WAN via USB. You could connect a 4G or 5G dongle, or your phone in tethering mode to the USB port. However it is probably easier to connect to you're phone's Wifi hotspot instead.
The Wifi for this router is limited to the 2.4GHz band only. Therefore it will never become a speed devil. But that was never the intention of this system.
There are several reasons why I've chosen for this router.
The fact that I already owned it is probably the most important reason.
And the second reason is its small size.
This is particularly useful because of the small space available in the rack.
And the external antennas are also quite useful, they allow me to connect bigger antennas for a more stable Wifi connection.
My little router is, I guess, more than 10 years old already.
And the funny thing is that, at the time of this writing, you can still get a new one for about €40.
The network switch
The second slot is occupied by a 5 port network switch. More is definitely not going to fit. Unfortunately I didn't have a 5 port switch lying around. So I had to buy one. I've settled on the TP-Link SG105E. The E version was not even €1 more expensive than the regular version. The difference is that the E version is a managed switch. Now I can even create VLANs, if I want. Not that I need any in my mini rack, but I was in a generous mood and chose the more expensive one anyway.
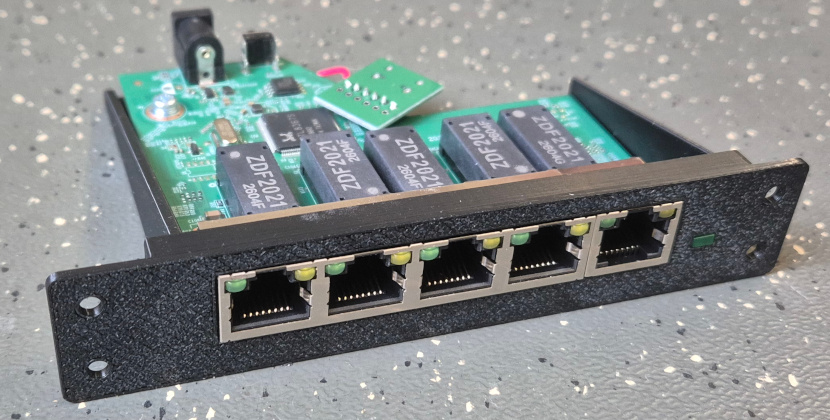
The most important reason why I chose this switch is because it is powered by a single 5V. This makes the power supply design of the rack a lot simpler, now everything is running on 5V.
A 5 port switch is more than sufficient for this setup. I need one uplink port, which connects to the LAN of the router. Three ports are running to each of the built in computers. This leaves one port to spare, which can be used to connect my laptop.
The computers
The remaining slots are occupied by Raspberry Pis. I had 3 Raspberry Pi 3B+ models lying around for this purpose. One of them will be used as a demo Home Assistant server. I'm new to Home Assistant, so I can use it to learn something myself. This way the mini rack has some practical purpose for me anyway.
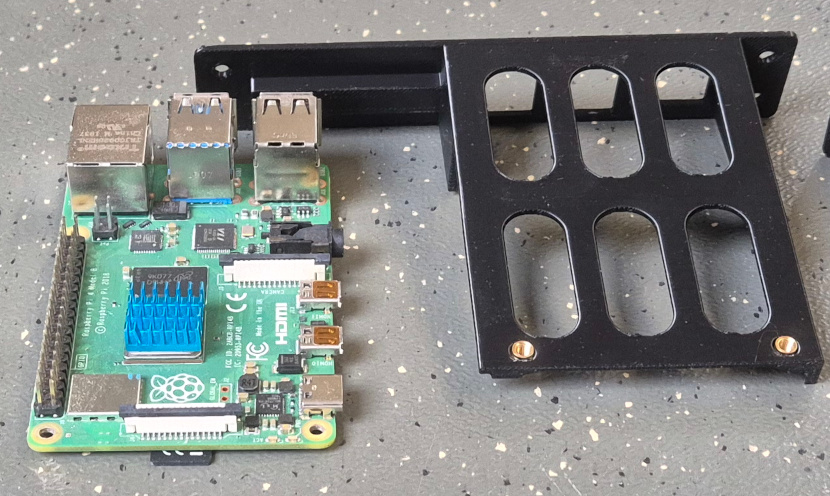
The second Pi will run several demo Docker containers. This web page is served by one of these Docker containers running Nginx.
The third slot will also contain a Raspberry Pi, which will be used as a test system. Just for miscellaneous testing purposes. It's not a problem when this system breaks, I can restore the SD card from a backup image at any time.
At least, that was the plan.
In the mean time I kept a watchful eye on the Dutch second hand market, just in case some affordable Raspberry Pi 4 with at least 2GB of RAM were for sale.
Those will run Home Assistant and Docker a lot smoother.
And fortunately I came across a seller who had multiple 2GB Pis for sale for €30 a pice.
That's a good price.
Some people even try to sell a used Raspberry Pi 3 for that price, while you can get a brand new one for the same amount.
So now Home Assistant and the Docker machine are running each on their own Raspberry Pi 4 with 2GB RAM.
It goes without saying that they are absolutely no competition to a mini PC.
But at least they fit nicely in my 5-inch mini Server rack.
Performance
All in all it is obvious that this setup is never going to be a speed devil. It never was intended to be one. The only goal for me was to build a cute small 5-inch Server rack, which can easily be taken on a tour for demonstrations about Home Automation and Self-hosting. And the fact that it can serve some useful purposes anyway is just a nice bonus.
The power supply
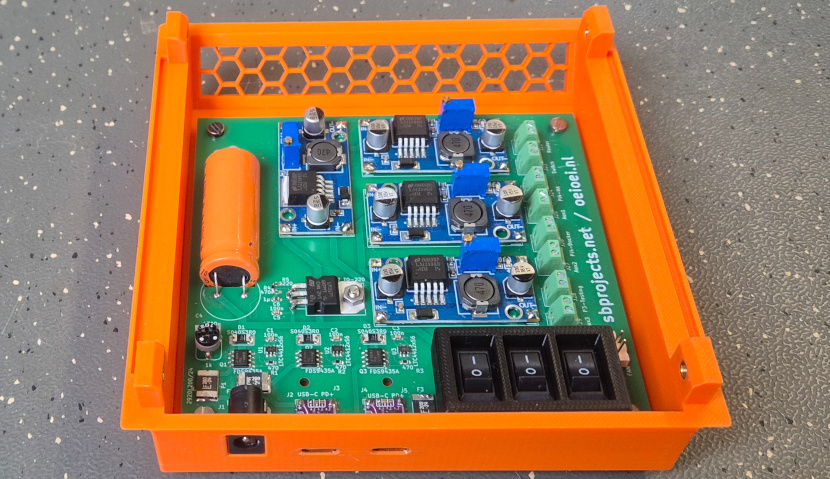
And now a few words on the power supply.
For the first setup I used 4 individual 5V power supplies.
That proved to be a bit awkward and the wiring had the tendency to get tangled up really quickly.
My first thought was to replace it all by one laptop power supply.
Those usually supply 19V at at least 3A.
This voltage can easily be converted to 5.1V by 4 individual DC-DC converters.
But then someone came up with the brilliant idea to use a USB-C phone charger with Power Delivery.
Those are more compact and have a well defined plug and they cost next to nothing nowadays.
And as a bonus I can power the rack using a USB-C PD power bank for a while, when necessary.
The voltage for the 12V fan is made adjustable, allowing me to reduce the noise when the temperatures allow it.
The 3 switches on the right allow me to individually power down the 3 computers when necessary.
A 3D printed frame avoids accidental switching when something is dropped onto the switches.
The end result
Now I own a beautiful, cute, little server rack which is highly portable.
Therefore it may happen that this website is temporarily offline while I'm traveling with it.
But as soon I arrive at the destination, all I need is some power and a Wifi connection to get it all back online again.
Until I go home again of course.
But as soon as I come home I will immediately connect the rack to the internet again, I promise.
The rack is ready. Now I need to find some time to write an article about it on my Dutch and English web sites. These are https://oeioei.nl and https://sbprojects.net respectively.